 how-to
Best Hardwood Flooring for Basement Moisture
Table of Contents
- Why Moisture Resistance Matters for Basement Hardwood
- Engineered Hardwood vs. Solid Hardwood for Basement Flooring
- How to Test Concrete for Moisture Before Installation
- Basement Moisture Barrier Requirements and Installation
- Proper Subfloor Preparation and Moisture Mitigation
- Installation Methods That Work in Moisture-Prone Basements
- Maintenance and Long-Term Durability of Basement Hardwood
- Conclusion
- Frequently Asked Questions
Last Updated: September 27, 2026
Why Moisture Resistance Matters for Basement Hardwood
Moisture is the enemy of hardwood floors. Wood is hygroscopic, it absorbs and releases moisture based on surrounding humidity. When relative humidity exceeds 55%, solid hardwood swells; when it dries, it shrinks. This constant expansion and contraction causes cupping, buckling, and separation at seams.
The difference between a floor that lasts 20 years and one that fails in 3 years often comes down to one factor: whether moisture testing and barriers were installed correctly before the first plank went down.
Choosing the best hardwood flooring for basement moisture requires understanding your basement's moisture dynamics, testing your concrete slab, installing proper vapor barriers, and selecting engineered wood with a moisture-resistant core.
Engineered Hardwood vs. Solid Hardwood for Basement Flooring
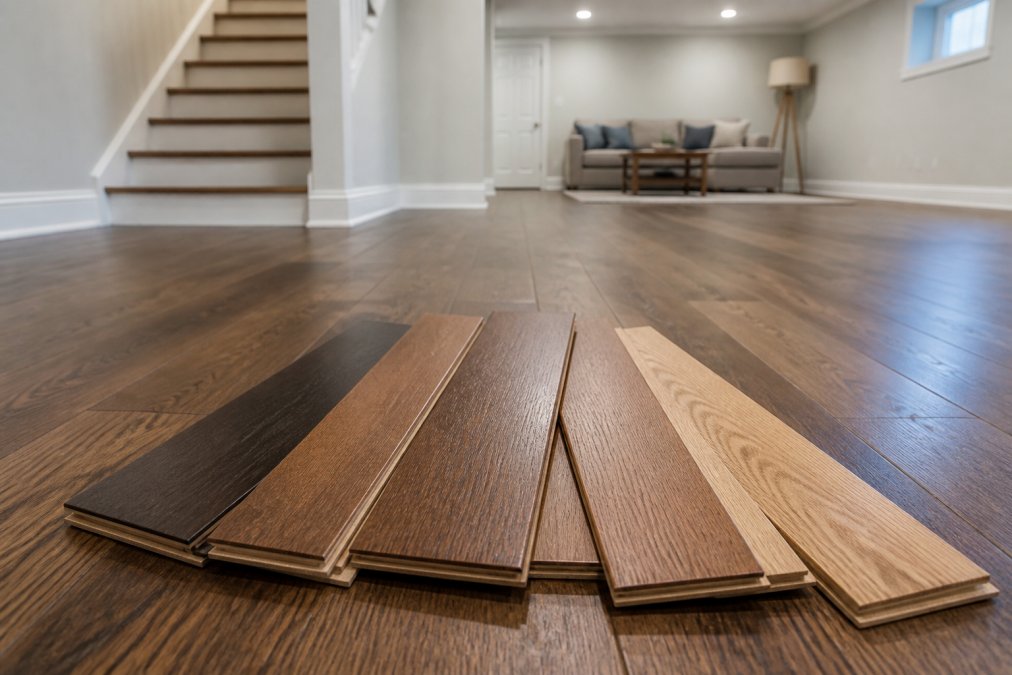
Engineered hardwood is the better choice for basements. It has a plywood or high-density fiberboard core with a hardwood veneer, resisting dimensional changes from humidity swings. Solid hardwood, made from one piece of wood, is vulnerable below grade, moisture penetrates from below and causes the wood to swell and shrink.
Engineered hardwood advantages for basements:
- Resists warping and cupping from humidity
- Dimensional stability in fluctuating moisture conditions
- Can be glued directly to concrete with proper moisture barriers
- Thinner wear layer means easier refinishing if needed
- Tolerates relative humidity up to 60% without significant issues
Solid hardwood limitations below grade:
- Expands and contracts with moisture changes
- Requires a wood subfloor, not concrete
- Difficult to install over hydrostatic pressure
- Higher risk of mold if moisture penetrates
- More expensive to repair if moisture damage occurs
How to Test Concrete for Moisture Before Installation
Testing concrete moisture before installation is essential.
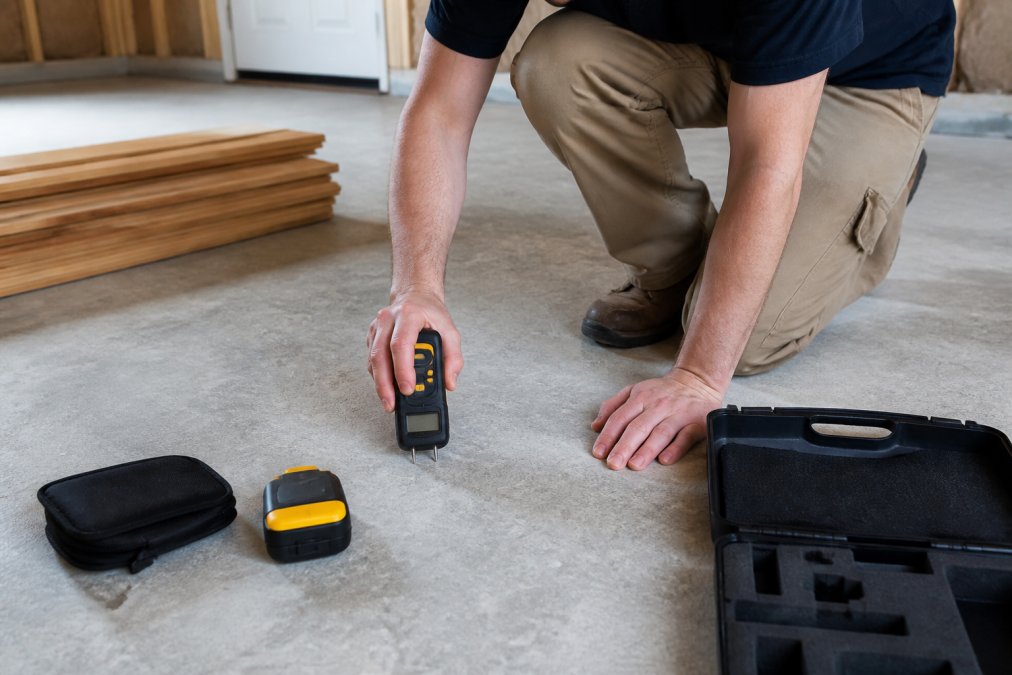
Two methods exist: the calcium chloride test (measures moisture absorption over 24 hours) and the moisture meter method (provides immediate readings).
Most manufacturers require concrete moisture below 3 lbs/1,000 sq ft/24 hrs (calcium chloride) or 40% RH (moisture meter). Higher readings require moisture mitigation before installation.
Testing steps:
- Take readings in at least 3-5 locations across the basement
- Test in the center of the room, not near walls
- Ensure concrete is at least 7 days old before testing
- Document all readings and keep records
High moisture readings don't mean you can't install hardwood. It means you need to install a proper moisture barrier first.
Basement Moisture Barrier Requirements and Installation
A moisture barrier sits between concrete and hardwood and prevents water vapor from rising into the wood. Installation errors are the leading cause of basement hardwood failure. Two types exist: sheet barriers (polyethylene or polyurethane films) and liquid-applied barriers (painted or sprayed for seamless sealing).
Sheet barriers range from 4-6 mil polyethylene (standard) to 10-15 mil reinforced polyurethane (premium). Standard 4-mil is cost-effective but vulnerable to tears; professionals recommend 6-mil minimum for basements. Reinforced polyurethane (10-15 mil) is more durable and resists UV exposure.
Liquid-applied barriers are moisture-cured polyurethane or epoxy coatings applied at 20-40 mils dry film thickness. They create a seamless seal ideal for irregular surfaces and around posts but require 24-48 hours cure time and proper surface preparation.
Why barriers fail:
The most common failure is incomplete sealing at seams and edges. Gaps as small as 1/8 inch allow water vapor to migrate around the barrier. All seams must be sealed with waterproof tape rated for below-grade use.
Puncture during installation is a second failure mode. Concrete prep work, underlayment installation, or foot traffic can tear sheet barriers. Liquid barriers resist puncture better but fail if concrete is too wet during application or coating is too thin.
Many barriers are installed before curing fully. Moisture-cured polyurethane requires 24-48 hours before flooring adhesive is applied. Installing too early traps moisture and creates mold growth pockets.
Barrier installation requirements:
- Extend barrier up the walls 6 inches and secure with adhesive or tape to prevent peeling
- Overlap seams by at least 6 inches; use waterproof tape rated for below-grade moisture barriers on all seams
- Tape all penetrations (pipes, posts, electrical conduit) with waterproof tape; do not leave gaps
- For sheet barriers, use a roller to press the material firmly against the concrete to eliminate air pockets
- Allow barrier to cure per manufacturer guidelines before any flooring installation begins
- For liquid barriers, ensure concrete is clean and dry (below 80% RH) before application; apply in thin, even coats to achieve target dry film thickness
- Do not install flooring until barrier is fully set and any adhesive residue is removed
Barrier performance standards:
Look for barriers meeting ASTM E96 (water vapor transmission rate) and ASTM D779 (puncture resistance). Barriers rated below 0.1 perms are vapor-impermeable and suitable for below-grade use; above 1.0 perm is too permeable. The barrier only works if continuous and properly sealed.
Proper Subfloor Preparation and Moisture Mitigation
In a basement with a concrete slab, your subfloor strategy depends on moisture levels and installation method. For glue-down installations, the moisture barrier is your subfloor. For floating systems, install underlayment on top of the barrier for cushioning and moisture protection. If moisture exceeds 60% RH, use a dehumidifier or consider a sump pump and interior drainage. Foam insulation under the barrier reduces condensation risk.
Installation Methods That Work in Moisture-Prone Basements
Three installation methods work for engineered hardwood in basements: glue-down, floating, and staple-down. Glue-down bonds hardwood directly to the moisture barrier with below-grade-rated adhesive, durable but difficult to repair. Floating systems rest on underlayment without attachment, allowing slight expansion and contraction, easier to install but less ideal for high-traffic areas. All methods require 48-72 hours acclimation before installation.
Installation method comparison:
| Method | Moisture Tolerance | Installation Difficulty | Repairability | Best For |
|---|---|---|---|---|
| Glue-down | High (with proper barrier) | Moderate | Difficult | High-moisture basements, high-traffic areas |
| Floating | Moderate | Easy | Easy | Lower-moisture basements, DIY projects |
| Staple-down | Low | Moderate | Moderate | Above-grade only (not recommended below grade) |
Maintenance and Long-Term Durability of Basement Hardwood
Engineered hardwood in a basement requires ongoing moisture management and realistic expectations about warranty coverage and repairability.
Humidity monitoring and control:
Keep relative humidity between 35% and 55% year-round. Below 35%, wood veneer cracks; above 55%, cupping and mold growth occur. Monitor humidity monthly with a hygrometer placed in the basement center. If humidity exceeds 55%, install a dehumidifier; if it drops below 35%, use a humidifier.
Warranty implications of basement installation:
Most hardwood flooring manufacturers void or significantly limit their warranty for below-grade installations. This is a critical point many homeowners miss. Standard manufacturer warranties typically cover:
- Defects in materials and workmanship for 25-30 years (above grade)
- Structural failure, cupping, or buckling for 10-15 years (above grade)
- Finish wear-through for 5-10 years (above grade)
For basement installations, these warranties are often reduced to 3-5 years or voided entirely if moisture levels exceed manufacturer specifications at the time of installation. Some manufacturers require written proof of moisture testing (calcium chloride or moisture meter readings) before the warranty takes effect. If you cannot provide documentation showing concrete moisture was below 3 lbs/1,000 sq ft/24 hrs (or 40% RH) at installation, the warranty may be denied if moisture damage occurs later.
Read the fine print of your flooring manufacturer's warranty before purchase. Ask specifically about basement coverage and what documentation is required.
Repairability and moisture damage recovery:
Spill response and water events:
Inspection and maintenance schedule:
Basement hardwood maintenance checklist:
- Monitor humidity levels monthly; maintain 35-55% RH year-round
- Use a dehumidifier if humidity exceeds 55%; use a humidifier if it drops below 35%
- Clean spills immediately; do not allow standing water
- Inspect seams, edges, and corners for moisture damage quarterly
- Fix any plumbing leaks or foundation seepage immediately
- Refinish wear layer every 7-10 years with moisture-resistant finish
- Keep documentation of moisture testing, installation, and any repairs for warranty claims
- Avoid direct moisture exposure; do not use basements for water-prone activities (laundry without proper drainage, pool storage, etc.)
Conclusion
Choosing the best hardwood flooring for basement moisture starts with understanding your basement's moisture profile. Test your concrete slab, install a proper moisture barrier, select engineered hardwood with a waterproof core, and commit to humidity management. ScreenCoat Painting & Flooring has installed hardwood in basements across Essex County, and the floors that last are the ones where moisture was treated as the primary concern, not an afterthought.
Frequently Asked Questions
What is the best type of hardwood flooring for a basement with high humidity?
Engineered hardwood flooring is the best choice for basements with moisture concerns. Unlike solid hardwood, engineered wood has a plywood core that resists dimensional changes caused by humidity fluctuations. The cross-grain construction of the core reduces warping and cupping. Look for engineered hardwood with a thicker wear layer (at least 2mm) and a waterproof core rated for below-grade installations. Pair it with a proper vapor barrier and moisture testing before installation to ensure long-term stability.
How do you test concrete for moisture before installing hardwood floors?
Use a moisture meter to test your concrete slab at multiple locations across the basement. Readings should meet manufacturer specifications. You can also perform a simple plastic sheet test: tape a 2-foot-by-2-foot plastic sheet to the concrete and check for condensation after 24 hours. If moisture appears, you need additional moisture mitigation before any hardwood installation. Professional testing is recommended for older basements or homes with a history of water issues.
What are basement moisture barrier requirements for hardwood flooring?
A vapor barrier is essential for basement hardwood installations. Use a 6-mil polyethylene sheeting or a specialized moisture barrier product rated for below-grade use. The barrier should be laid over the concrete slab before any subfloor or underlayment is installed. Tape all seams with a moisture-resistant tape to prevent water vapor from penetrating upward. Some engineered hardwood products include an integrated waterproof backing, but this does not eliminate the need for a separate vapor barrier beneath the flooring. Proper barrier installation prevents hydrostatic pressure and moisture from damaging the wood.
Why is solid hardwood not recommended for basements?
Solid hardwood is hygroscopic, meaning it absorbs and releases moisture based on relative humidity levels. In a basement, where humidity fluctuates significantly, solid wood expands and contracts unevenly, leading to cupping, warping, and buckling. These changes can cause permanent damage that is difficult or impossible to repair. Solid hardwood also lacks the cross-grain stability of engineered wood's plywood core. Building codes and flooring manufacturers typically do not warrant solid hardwood installations below grade, making engineered hardwood the only practical choice for basement environments.