 how-to
Signs of Subfloor Damage Before Flooring
Table of Contents
- Why Subfloor Inspection Matters Before New Flooring
- What You'll Need to Inspect Your Subfloor
- Common Signs of Water Damage in Subfloor
- Detecting Uneven Subfloor Before Hardwood Installation
- Step-by-Step Subfloor Inspection Checklist
- Subfloor Moisture Testing Methods
- Subfloor Repair Before New Flooring Installation
- Common Mistakes to Avoid During Inspection
- Frequently Asked Questions
Last Updated: October 11, 2026
Why Subfloor Inspection Matters Before New Flooring
Before you install new hardwood flooring, you need to know what's underneath. Hidden damage in the subfloor can ruin expensive new floors within months.
A quick inspection upfront can save thousands in repairs.
This guide walks you through identifying the signs of subfloor damage before flooring installation.
What You'll Need to Inspect Your Subfloor
A proper inspection doesn't require expensive tools. You need basic items you likely have at home.
Essential tools:
- Hammer or small mallet
- Flathead screwdriver or putty knife
- Flashlight or headlamp
A moisture meter measures water content in wood and gives you concrete data instead of guesses.
Common Signs of Water Damage in Subfloor
Water damage in the subfloor shows itself in specific ways. Learn to spot these warning signs before they become catastrophic failures.
Stains, discoloration, and dark spots
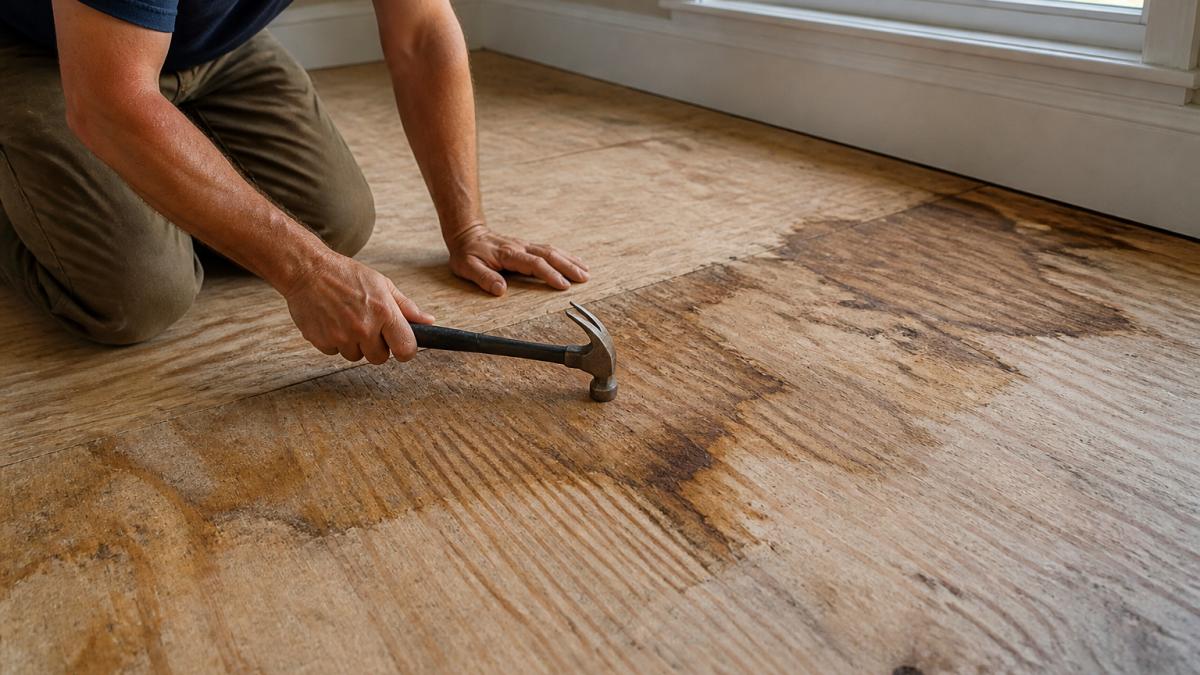
Dark stains on exposed subfloor are your clearest warning sign. Water leaves marks that don't fade.
Stains cluster around common leak sources: bathrooms, kitchens, and areas below plumbing.
Run your finger over stains. If the surface feels soft or crumbly, the wood is already breaking down.
Musty and damp odors
A musty smell indicates mold or mildew growing in moisture. Trust your nose, if the space smells damp, moisture is present.
Damp odors mean water is trapped in the subfloor structure. The problem is active, not historical. You need to find and stop the water source before installing new flooring.
Soft, spongy, or weakened areas
Press down on exposed subfloor with your boot. If areas give way under light pressure, the wood has absorbed water and lost strength.
Soft spots mean the subfloor can no longer support flooring. New hardwood will flex, creak, or crack because the base is unstable.
Detecting Uneven Subfloor Before Hardwood Installation
An uneven subfloor causes hardwood to cup, crown, or separate at seams. Detecting these problems now prevents expensive callbacks later.
Warping, swelling, and buckling
Water causes wood to swell, pushing boards up or creating waves.
Buckling looks dramatic: boards push upward and create visible humps. This happens when subfloor absorbs water from below and has nowhere to expand.
Warping twists the wood. Boards curl at edges or corners. Warped subfloor means the water damage is advanced and structural repair is necessary.
Floor movement and squeaks
Walk across exposed subfloor and listen for squeaks. Squeaks mean fasteners are loose or the subfloor is flexing more than it should.
Press down in different spots. The floor should feel solid everywhere. If some areas bounce or feel softer than others, moisture or structural damage is present.
Step-by-Step Subfloor Inspection Checklist
Follow this process to inspect systematically. Document what you find so you have a record before installation begins.
Step 1: Remove floor covering and inspect exposed subfloor
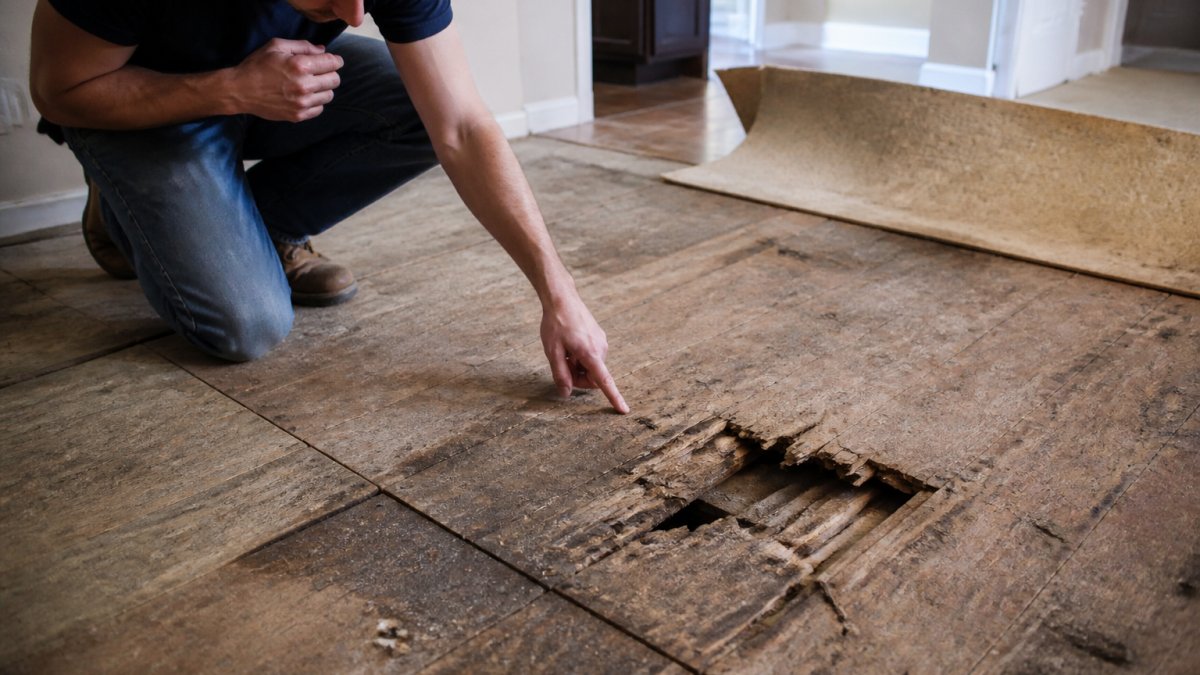
Pull back carpet, vinyl, or old hardwood to see the subfloor material. Look for visible water stains, discoloration, or soft areas.
Check all corners and edges, especially under bathrooms and kitchens where water often pools.
Step 2: Perform the tap and probe test
Tap across the subfloor surface with your hammer. Solid wood makes a sharp sound; soft or wet wood makes a dull thud.
Use your screwdriver to gently probe suspicious areas. Push the tip into the wood. It should resist. If the screwdriver sinks easily, the wood is compromised and needs replacement.
Step 3: Check for moisture sources and leaks
Look for active leaks. Check plumbing connections, toilet bases, and areas around pipes. Feel for dampness or standing water.
Inspect the basement or crawl space below. Look for signs of water intrusion: efflorescence (white powder on concrete), standing water, or damp soil. These indicate moisture is moving upward into the subfloor.
Subfloor Moisture Testing Methods
Moisture meters provide objective data that visual inspection cannot. They measure water content in wood and concrete, helping you decide whether the subfloor is ready for new flooring or needs drying time.
How to use a moisture meter
Pin meters (with two prongs) are more accurate for subfloor inspection because they reach deeper into the wood than pinless meters.
Press the pins firmly into the subfloor surface and hold steady for 3-5 seconds until the reading stabilizes. Test in at least 5-8 locations, including areas near plumbing, under bathrooms, and in corners where water pools.
Interpreting readings for wood subfloors
Most hardwood flooring manufacturers require the subfloor to be between 6% and 9% moisture content before installation. Readings above 14% indicate the wood is too wet.
What different readings mean:
- Below 9%: Ideal for hardwood installation. The subfloor is dry and stable.
- 9-12%: Acceptable for some hardwood products, but check your flooring manufacturer's specifications. Drying may be recommended.
- 12-14%: Borderline. The subfloor is damp. Run a dehumidifier and fan for 48-72 hours, then retest. Do not install hardwood until readings drop below 12%.
Testing concrete subfloors
Concrete subfloors require different testing because concrete wicks moisture from below. Use a pinless moisture meter designed for concrete or perform a calcium chloride test.
Concrete readings above 3 pounds per 1,000 square feet per 24 hours indicate too much moisture for hardwood. A moisture barrier or vapor retarder is essential when installing hardwood over concrete.
Drying the subfloor
- Run a dehumidifier in the room or space. Set it to extract moisture continuously.
- Use fans to circulate air across the subfloor surface. Box fans or shop fans work well.
- Open windows if weather permits (dry conditions only; do not introduce outside humidity).
Retest after 48-72 hours. If readings remain above acceptable levels, continue drying and retest every 2-3 days.
Subfloor Repair Before New Flooring Installation
Once you've identified damage, the decision to repair or replace depends on the material type, extent of damage, and moisture source. Different subfloor materials fail in different ways.
Plywood subfloors
Plywood is the most common subfloor material and offers good strength and stability.
Signs of repairable damage in plywood:
- Soft spots or water stains in isolated areas (smaller than 12 inches across)
- Surface discoloration without deep penetration
- Minor warping at edges
Cut out the damaged section using a circular saw, remove it down to the joists, and replace with new plywood of the same thickness.
Signs requiring full replacement:
- Soft spots in multiple locations across the subfloor
- Delamination (layers separating from each other)
- Widespread water stains or discoloration
Plywood that has been wet for extended periods loses strength throughout, not just in visible spots.
OSB subfloors
OSB is less expensive than plywood but more vulnerable to moisture. It swells and delamination when wet and does not dry as quickly.
Signs of repairable damage in OSB:
- Minor surface stains without swelling
- Small soft areas (less than 6 inches across) in isolated spots
OSB repairs are riskier than plywood repairs because the material does not regain its original strength after water exposure.
Signs requiring replacement:
- Visible swelling or buckling
- Soft spots larger than 6 inches
- Any delamination (edges separating or layers peeling apart)
- Musty odors indicating mold growth in the OSB
OSB is more prone to mold growth than plywood.
Concrete subfloors
Concrete is durable but wicks moisture from the soil below. Damage in concrete is usually not structural failure but moisture intrusion.
Repairable concrete issues:
- Surface cracks (hairline to 1/8 inch wide)
- Minor efflorescence (white powder deposits)
- Localized spalling (surface flaking) in small areas
Fill hairline cracks with concrete crack filler.
Concrete issues requiring professional assessment:
- Cracks wider than 1/8 inch
- Structural cracks (diagonal or step patterns)
- Standing water or active seepage
- High moisture readings that persist after drying
Wide cracks or structural cracks indicate foundation movement or water pressure from below. These require a structural engineer or concrete specialist.
When to call a professional
Stop DIY work and hire a professional if you encounter any of the following:
- Active leaks or water intrusion: Plumbing leaks, roof leaks, or water seeping through foundation walls require a licensed plumber or contractor to locate and repair the source.
- Mold or musty odors: Mold growth indicates moisture has been present long enough for biological colonization. Mold remediation requires a certified mold specialist. Do not disturb moldy material yourself; spores can spread.
- Structural damage: Sagging, movement between joists, or widespread soft spots indicate the subfloor can no longer support weight safely. A structural engineer or experienced contractor must assess whether repair or replacement is needed.
- Extensive damage: If more than 20-25% of the subfloor is damaged, or if damage is scattered across multiple areas, professional replacement is more reliable than patchwork repairs.
Common Mistakes to Avoid During Inspection
Most homeowners miss critical problems because they rush or don't know what to look for.
Don't skip the crawl space or basement, moisture travels upward, so check the source.
Don't assume old stains are dry.
Don't install flooring over uneven subfloor.
| Common Mistake | What Happens | How to Avoid It |
|---|---|---|
| Skipping moisture testing | New flooring fails within months | Use a moisture meter in multiple locations |
| Ignoring soft spots | Subfloor collapses under flooring | Replace damaged sections before installation |
| Missing the moisture source | Water damage returns after repair | Inspect basement and check for active leaks |
| Rushing inspection | Hidden damage goes undetected | Take time to tap, probe, and document findings |
| Installing over uneven subfloor | Hardwood cups, cracks, or separates | Level the surface or replace warped sections |
Contact Hardwood Floor Refinishing & Restoration for a free in-home estimate.
Frequently Asked Questions
What are the most obvious signs of subfloor damage?
The clearest indicators include soft or spongy areas underfoot, visible stains and discoloration on the subfloor, musty or damp odors, and warping or buckling of the floor surface. You may also notice squeaks, movement when walking, or uneven flooring. If you press on the subfloor with a screwdriver or probe and it sinks in easily, that signals decay or water damage. Dark spots and peeling vinyl flooring above can also point to moisture problems in the subfloor beneath.
How can you check a subfloor before installing new hardwood flooring?
Remove the existing floor covering to expose the subfloor completely. Inspect the surface visually for stains, discoloration, soft spots, and signs of rot. Use a hammer or screwdriver to tap and probe the subfloor, solid material will sound firm, while damaged areas will feel soft or crumbly. Check for moisture sources like leaks from plumbing or basement water intrusion. Look at floor joists below for decay or structural damage. If moisture is suspected, use a moisture meter to test the subfloor and surrounding wood.
Can you install hardwood flooring over a damaged subfloor?
No. Installing new hardwood flooring over a damaged or wet subfloor will cause the new flooring to warp, buckle, and fail prematurely. Moisture-damaged subfloors trap moisture and prevent proper adhesion, leading to structural problems and costly replacement. Any decay, rot, or active moisture must be addressed before installation. This may mean repairing localized damage, replacing sections of plywood or OSB, or fixing the source of moisture intrusion. A professional inspection ensures the subfloor is sound and dry before new flooring is laid.
How uneven can a subfloor be before installing hardwood?
Subfloors should be as level as possible before hardwood installation. Minor variations of up to 1/8 inch over 10 feet are typically acceptable, but larger dips, hills, or uneven areas cause the hardwood to sit unevenly, leading to gaps, squeaks, and premature wear. Significant unevenness may require leveling compound or subfloor repair. Warped, swollen, or buckled subfloors indicate moisture damage and must be replaced or repaired. A professional can assess whether the existing subfloor meets installation standards or needs correction.