 how-to
Preventing Squeaky Hardwood Floors: Installation Guide
Table of Contents
- Why Squeaky Hardwood Floors Start During Installation
- Common Causes of Squeaky Hardwood Floors
- Hardwood Flooring Subfloor Preparation: The Quiet Foundation
- Acclimating Hardwood Flooring Before Installation
- Choosing Hardwood Floor Installation Fasteners
- Installation Techniques That Prevent Squeaks
- Post-Installation Checks and When to Call a Professional
- Frequently Asked Questions
Last Updated: October 17, 2026
Why Squeaky Hardwood Floors Start During Installation
A squeak is friction between two surfaces, and in most homes that rubbing starts the day the floor goes down. Preventing squeaky hardwood floors during installation comes down to four decisions: subfloor flatness, wood moisture, fastener driving, and whether boards are glued as well as nailed.
Almost every squeak we trace back has a cause that was visible, fixable, and ignored during the install. Below, we walk through each one, plus the checks that catch them before the boards go down.
Common Causes of Squeaky Hardwood Floors
The causes of squeaky hardwood floors fall into two buckets: movement between boards, and movement between the floor and the frame beneath it. Both trace back to installation. Seasonal humidity swings make an existing flaw louder but rarely create one.
Here is the short version of what goes wrong:
- Friction between boards when edges rub as the floor flexes
- Loose fasteners that let a plank rock instead of sit
- Gaps at the joist where a nail missed its mark
Movement and Friction Between Floorboards
Every wood floor moves. Boards expand and contract with humidity and flex slightly underfoot. The problem is when two boards are tight enough to touch but loose enough to slide, turning every step into a tiny sawing motion.
Installers call this a "rubbing" joint, and it usually shows up at butt joints and where a board crosses a joist. The fix: leave the correct expansion gap at the walls, keep board edges snug in the field, and fasten each plank tight enough that it cannot rock.
Loose Fasteners and Gaps
A fastener that misses the joist holds the board to air. That board becomes a seesaw, and the nails on either side work loose over time.
Two installation mistakes cause most of this:
- Blind-nailing too high or too low on the tongue, so the fastener splits the tongue or misses the joist entirely.
- Skipping fasteners to save time, leaving too much spacing between nails.
The result is a floor that sounds fine for a year, then starts chirping wherever traffic is heaviest.
Hardwood Flooring Subfloor Preparation: The Quiet Foundation
Hardwood flooring subfloor preparation decides whether the floor stays quiet. A flat, dry, solid subfloor gives every board full contact and every fastener something to bite; a wavy or damp one guarantees flex, and flex means noise.
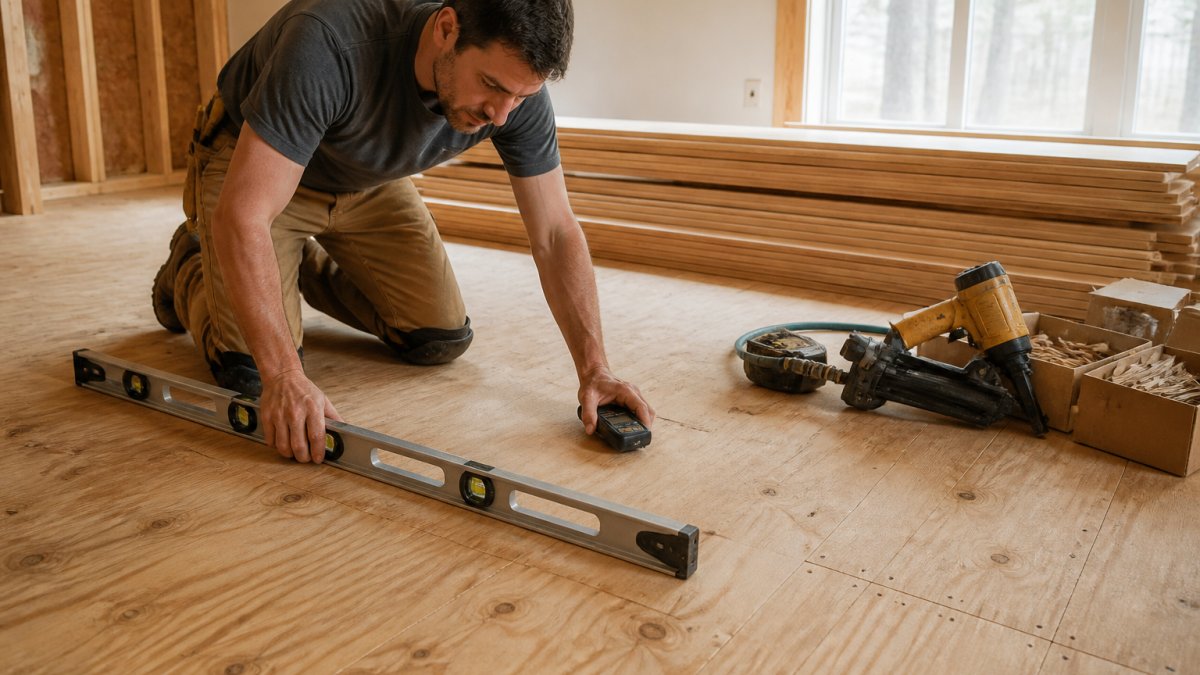
Step 1: Inspect flatness with a straightedge, not a level
Set a 6-foot or 8-foot straightedge across the room in several directions and look for gaps under it. Most manufacturers specify a flatness tolerance, commonly 3/16 inch in 10 feet, or 1/8 inch in 6 feet, so confirm the number in the installation instructions. Sand or plane high spots; fill low spots with a patching compound rated for the substrate.
Step 2: Check solidity and re-fasten the subfloor
Walk the subfloor in heavy boots and listen. Any soft spot, bounce, or movement gets screwed down tight before flooring goes over it. Drive down or replace loose screws and nails, and add screws where panels meet. A squeaky subfloor under a new floor is the hardest kind to fix later because you have to pull boards to reach it.
Step 3: Measure moisture in the subfloor and the room
Check the subfloor with a moisture meter and confirm it reads dry for the flooring type going over it. For wood subfloors, many installers want the subfloor and flooring readings within a few percentage points. For concrete, a calcium chloride test or an in-situ relative humidity probe beats a pin meter. Over a basement or crawl space, address moisture there first, a damp space below pushes vapor up through the subfloor, and no acclimation schedule fixes that.
Step 4: Confirm the substrate matches the installation method
Not every subfloor accepts every floor. Solid hardwood over concrete needs adhesive or a floating system because nails have nothing to bite. Engineered hardwood covers more substrates but still has flatness and moisture limits. Plywood and OSB should be sound, properly gapped, and free of delamination. Mismatched substrate and flooring means movement, the raw material of a squeak.
Acclimating Hardwood Flooring Before Installation
Acclimating hardwood flooring before installation means letting the wood sit in the room where it will be installed long enough to reach the room's moisture level. Wood that goes down wet shrinks as it dries, opening gaps and loosening fasteners; wood that goes down too dry swells and cups.
A few practical rules:
- Stack the boxes in the room, off the floor, with spacers between layers so air moves around every board.
- Keep the home's HVAC running at normal living conditions during acclimation, not wide open or shut off.
- Check moisture content of the wood against the subfloor with a meter before installing. If the two are far apart, wait.
Choosing Hardwood Floor Installation Fasteners
Hardwood floor installation fasteners do two jobs: hold the board to the subfloor and pull it tight against its neighbor. Match the fastener to the flooring and subfloor and it holds; pick the wrong type or length and the floor loosens.
Fastener selection by flooring type:
| Flooring Type | Typical Fastener | Notes |
|---|---|---|
| Solid hardwood over wood subfloor | Cleats or staples, blind-nailed through the tongue | Length matched to flooring thickness so the fastener reaches the subfloor |
| Solid hardwood over concrete | Adhesive or a floating system | Nails have nothing to bite into concrete |
| Engineered hardwood | Staples or cleats sized for the thinner profile, or adhesive | Follow the manufacturer's spec; engineered boards are thinner and split easily |
| Any floor over a joist | Fastener long enough to penetrate the subfloor and reach the joist | Short fasteners that stop in the subfloor let boards rock |
Length matters more than most people think. A fastener that stops inside the subfloor without reaching the joist holds the board to the subfloor but not the frame, fine in some systems, a squeak waiting to happen in others.
Nails vs. Screws: What Works Best
For blind-nailed solid hardwood, cleats and staples driven by a flooring nailer are standard when driven at the right angle and depth.
Use the flooring nailer for the field and reserve screws for problem spots, like a board that will not pull tight or a repair.
A common mistake is over-driving fasteners. A nail set too deep crushes the tongue and splits the board, which loosens the joint instead of tightening it.
Installation Techniques That Prevent Squeaks
Installation technique is where prevention actually happens, and it has to match the method. Nail-down, staple-down, glue-down, and floating floors fail in different ways, so the anti-squeak moves differ too. A squeaky floor is often one installed with the wrong method for its substrate.
Match the method to the substrate first
- Nail-down or staple-down: solid hardwood over a wood subfloor. Fasteners must reach the subfloor and, where the board crosses a joist, the joist itself.
- Glue-down: engineered or solid over concrete, or over wood where a stiff, quiet assembly matters. Adhesive is the primary fastening method, so surface prep and moisture control become even more important.
- Floating: engineered or solid over a suitable underlayment. The floor is not fastened to the subfloor, so the underlayment and the expansion gaps do the quieting work.
An incorrect combination, nailing into concrete, gluing over a damp slab, or floating over an uneven subfloor, creates movement that no amount of face-nailing fixes later.
Securing boards to floor joists
Line up your starter row so board ends land on joists wherever possible; a butt joint between joists has nothing under it and will flex. Stagger joints between rows so no two butt joints sit side by side.
Then fasten on a consistent pattern:
- Drive fasteners through the tongue at the manufacturer's spacing, usually every few inches along the board and closer at the ends.
- Make sure each fastener actually reaches the joist where the board crosses one.
- At butt joints, fasten both boards on either side of the joint.
Using adhesive to strengthen the floor assembly
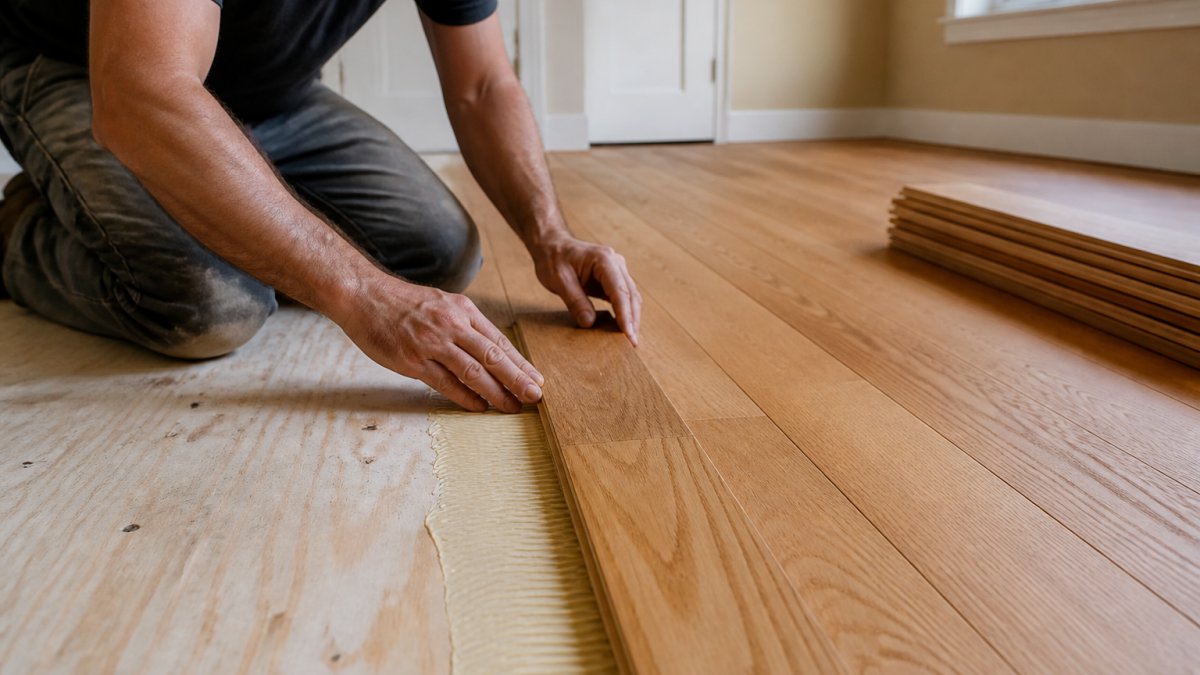
A bead of construction adhesive along the joists, or a full-spread adhesive under the boards, bonds the floor to the frame and stops the tiny movements that cause squeaks, plus adds a second line of defense if a fastener misses. Adhesive is a partner to fasteners, not a substitute, use both, rated for hardwood flooring. On concrete, adhesive is often the primary method.
Floating floors: the underlayment is the fastener
A floating floor has no fasteners to tighten, so the underlayment and expansion gaps carry the load. Use an underlayment rated for the flooring and substrate, leave the manufacturer's expansion gap at every wall and fixed object, and do not pin the floor with trim or cabinets. A floor trapped at the edges has nowhere to move, and the movement shows up as noise.
Post-Installation Checks and When to Call a Professional
Walk the finished floor before the furniture goes back. Listen at doorways, in front of the sink, and along the traffic path, and tap boards with a scrap for hollow spots.
Some problems are beyond a DIY fix:
- A squeak that comes back after tightening
- A board that rocks no matter how you fasten it
- A floor that has cupped or gapped after install, which points to a moisture problem
That is when to call a professional. We handle floor repairs, damaged board replacement, and full refinishing, and we can tell you whether the fix is a local repair or a bigger correction underneath.
Frequently Asked Questions
What is the best way to prevent hardwood floors from squeaking?
Prevention starts with a solid subfloor: fix loose boards, check flatness, and address moisture before installation. Use the right fasteners for your flooring type and thickness, and follow the manufacturer's fastener spacing. Acclimate the wood to the room's conditions, and consider adding adhesive along with nails or screws to reduce movement. During installation, ensure every board is securely attached to the subfloor or joists, and avoid gaps that allow friction. These steps together stop most squeaks before they begin.
What causes floors to squeak when you walk on them?
Squeaks typically come from movement between floorboards or between the subfloor and joists. When fasteners loosen or wood shrinks and expands with humidity changes, gaps appear and boards rub against each other or against nails. Friction between wood surfaces creates the noise. In older homes, sagging joists or insufficient subfloor attachment are common culprits. During installation, inadequate fastening or skipping subfloor prep sets the stage for squeaks later.
Which fasteners help prevent squeaks in hardwood flooring?
For solid hardwood, use cleats or staples designed for flooring, sized according to board thickness. For engineered hardwood, follow the manufacturer's recommendation, often narrower staples or cleats. Screws can be used for subfloor attachment to joists to eliminate movement. Avoid drywall screws or nails not rated for flooring. Ensure fasteners penetrate the subfloor and, where possible, into joists. Proper spacing, typically every 6 to 8 inches along the board and 1 to 2 inches from ends, keeps boards tight.
What should you do if a newly installed hardwood floor squeaks?
First, identify the source: walk on the floor to pinpoint the squeak, then check if it's coming from a board or the subfloor. If accessible from below (unfinished basement), you can add shims or screw through the subfloor into the joist to tighten. From above, you can try injecting a lubricant or using a trim-head screw through the board into a joist, countersinking and filling. If the squeak is widespread or the floor is glued down, contact the installer and review the warranty. Addressing it early prevents worsening.
A quiet floor is not luck. It is a flat subfloor, dry wood, the right fasteners, and adhesive doing its job. If your floor is already talking back, or you are planning an install and want it done right the first time, Hardwood Floor Refinishing & Restoration can help. We bring over a decade of local experience, careful prep, dependable scheduling, and clean job sites to every project. Get your free estimate and let us help you get a floor that stays silent for years.